![]()
First there is some setup you need to do to your file after you open it in Paint Shop Pro.
In the game your object will likely be behind both a light and a dark background at some point. Therefore, the object needs to look good on both. At different points you make these two background layers visible to see how the object looks behind each. For now they can stay hidden.
One more layer needs to be created.
This layer is used to create a mask. The visibility of the Original Image layer is set by the mask. On a mask, white areas are visible, black areas are invisible, and shades of gray are levels of visibility in between. Working on a mask ensures that the original image doesn't get permanently erased. If you make a mistake you can paint the image back in with white.
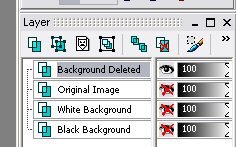
The layers look like this:
Next set the color used as your background to be invisible.
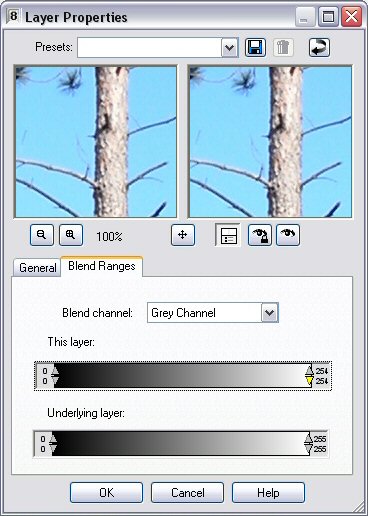
This sets white as the invisible color. Anything with a pure white color is now invisible. If anything in your object becomes invisible at this point you need to use a different color. While there is some white in the bark on this example, none of it is the pure white color. If you do need to use a different color use the left side arrows to use black or use the blend channel box to change to a color.
I recommend saving often so you don't lose any work. Save it in PSP format so all of the layers and other formatting remain intact.
Next go to Section 2: Deleting the Background.
Return to Photoshop 2D Object Tutorial Main Page