AccuTrans 3D is used to create the DXF mesh from the files saved in 3DEM. Before you begin visit the AccuTrans 3D website to download and install it.
3DEM saves a *.txt and *.hdr file with the name you gave it. If you can't see extensions–
Open any folder in windows
Go to Tools > Folder Options.
Click on the View Tab and uncheck "Hide extensions for known file types".
Now find the folder where you saved the files from 3DEM.
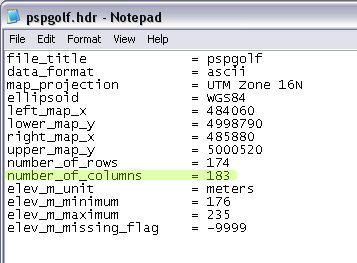
Open the *.hdr file in notepad. Open any folder in windows.
Find the line that says "number_of_columns" and make a note of the number.
Close Notepad.
Open AccuTrans 3D.
Go to File > Open DEM As > ASCII to DEM (*.txt)
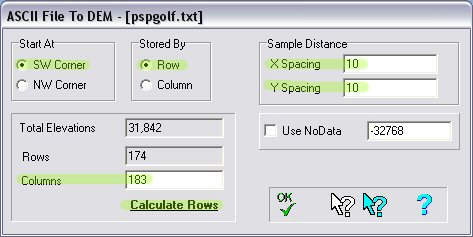
Find the *.txt file saved from 3DEM and open it. A dialog box opens.
Verify SW corner and Row are selected.
Under sample distance set X spacing and Y spacing to the resolution of your DEM in meters. For example if it is a 10 meter (1/3 arc second) DEM set the X and Y spacing to 10.
Next to columns enter the number you wrote down from the *.hdr file.
Click on the calculate rows button. This automatically calculates the number of rows based on the number of columns you enter.
Click OK. The DEM opens with a color coded contour map.
Go to Dem > Convert to 3D (less water).
Keep the default values and select OK. A 3D view of the DEM is displayed. You can move it around by clicking the display and dragging it.
Go to File > Save With Options.
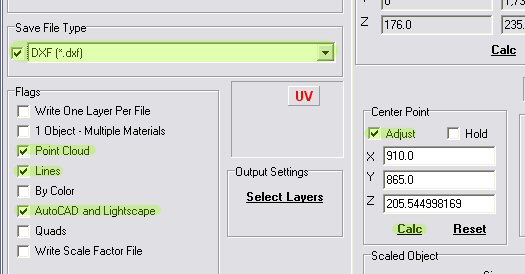
Under Save File Type chose DXF (*.dxf) and put a check in the check box to the left.
Under Flags verify there is a check next to Point Cloud, Lines, and AutoCAD and Lightscape.
Under Center Point put a check mark next to adjust and click the Calc button. This centers the mesh on your plot.
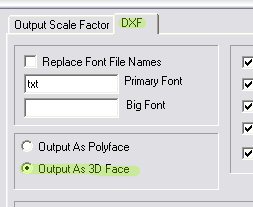
Click on the DXF tab and verify Output As 3D Face is selected.