![]()
All that is left to do now is getting the file in the correct format for PGA 2000.
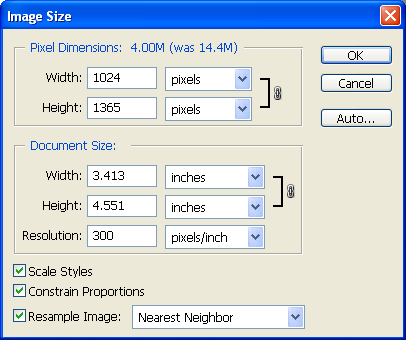
If you are working with a high resolution image, reduce the size of it first. A good rule of thumb is to reduce the resolution so that the default height in the course architect is around the maximum height you want the object in the game. Going larger then this doesn't make the object look any better, it only increase the file size of your library. For full size trees like this one I reduce the height resolution to 1365. This gives a default height of a little over 90 feet. You have to do some guess and check for this if you're shooting for a different height.
If you use a different type of resampling, blurring of the object edges with the background occurs. This causes off shades of the background color to show around the object in PGA 2000.
PGA 2000 requires an 8-bit (256 color) bitmap image.
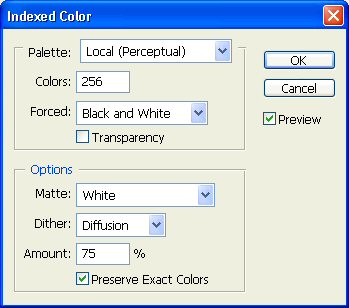
Typically something like pink is used for the matte color but I like to go with white unless I know there is a pure white color somewhere in my object. If there is a problem with losing pixels in the object you can always come back to your PSD file and resave it with a different matte color.
Finally save it in bitmap format. Remember, do not save a PSD version at this point because all of the layers have been removed.
Now just load the BMP in a PGA 2000 library.
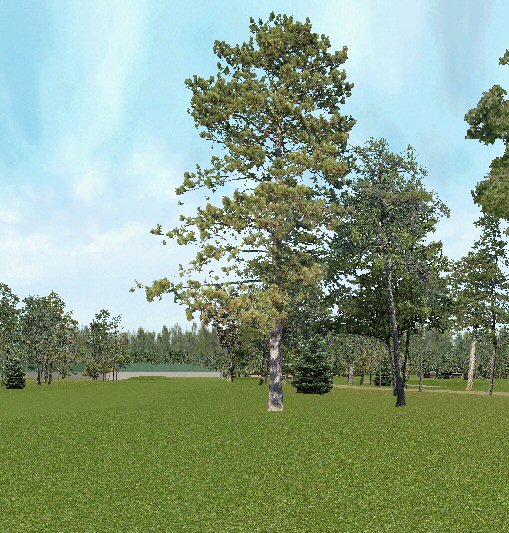
The library now shows up in the course architect. You have to recompile the library every time you make changes to it. Hopefully the end result is something that looks good both on its own (light background) and with other trees on your course (dark background).
If it does, congratulations, you're done!
If not, move on to Section 7: Troubleshooting.
Return to Photoshop 2D Object Tutorial Main Page